


HOW TO FLOSS TEETH
Flossing refers to the action where we use a thin material usually a string to dislodge food particles stuck in between your teeth thereby cleaning and reducing the amount of bacteria and plaque stuck between your teeth.
When do you floss your teeth?
There is a controversy as to whether we should floss teeth before or after brushing our teeth. Let’s think of it using the analogy of sweeping and moping your house. Do you mop your house then sweep those corners hard to reach with your mop? Or do you sweep those hard-to-reach corners then mop? Your guess is as good as mine. If you brush first then floss later all the plaque and bacteria dislodged from between your teeth will not be removed from the mouth. Flossing before brushing allows the plaque, bacteria and food remnants that are dislodged to be brushed away hence a cleaner mouth.
Types of dental floss
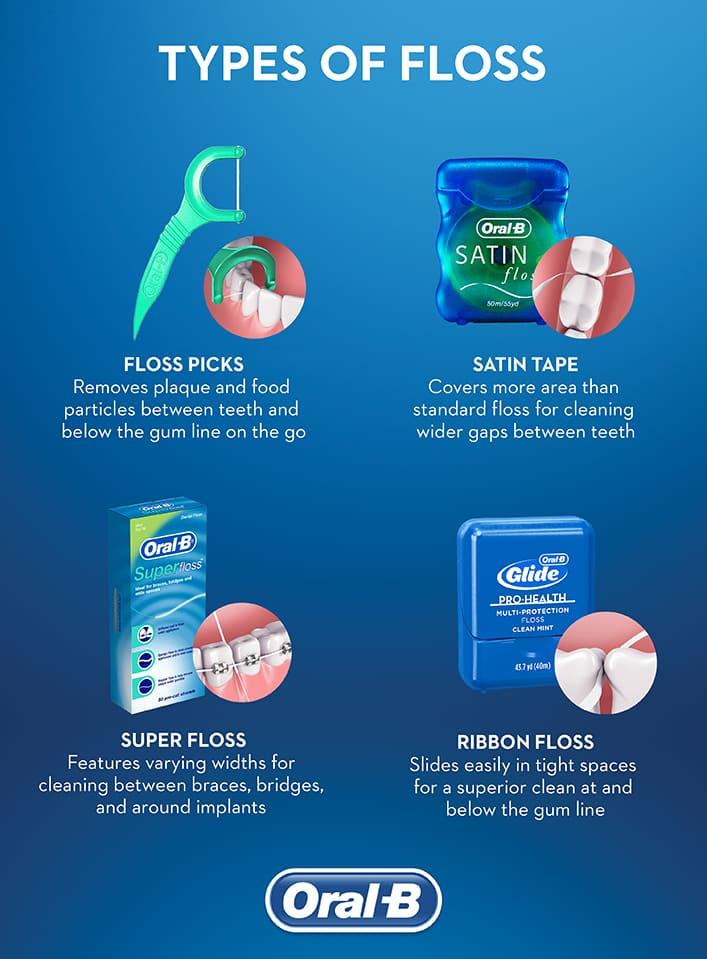
The following are the types of dental floss that are manufactured by one dental company
Floss picks- they double as floss and toothpicks. Removes plaque and food particles between teeth and below the gum line
Satin tapes- covers more area than the standard floss and are used for cleaning wider gaps between teeth.
Super floss- features vary widths hence effective for cleaning between braces, bridges and around implants.
Ribbon floss- Slides easily in tight spaces for between cleaning at and below the gumline.
water floss—-
How do you know what type of floss to use? Visit us to know what type of floss is best suited for you.
Flossing procedure
The floss pick comes ready to use however if you are using the other types the first thing you do is to break off a long piece of floss, usually the length of between one shoulder to another. Sounds too long? The next step elaborates why this is just the perfect length.
Wind one of the ends around one of your middle finger just enough for it not to be pulled off from your finger. Do the same for the middle finger on the other hand until you can’t pull it off. Doesn’t seem so long of a piece now, does it ? The extra length allows the grip by winding it around the fingers.
Now that the floss is tightly secured. Adjacent to your middle finger, hold it between the thumb and forefinger on both sides.
Relax your lips and cheeks as tightening them makes it difficult to get your finger in your mouth.
Gently guide the floss in between your teeth.
Curve the floss in a C shape against one tooth. The two sides of the adjacent teeth are usually flossed separately so as not to injure the triangular area of the gum between the two teeth.
Run the floss down to up against the tooth, from the gum line up until the contact area between the teeth.
Note
If its brownish or with a lot of residues that is a good sign that you are removing plaque
If it is frayed, there is a high possibility you have tooth decay between your teeth. Visit us to have it checked out and treated.
If it is blood stained there is a possibility you have bleeding gums and you should visit us to have it checked out and treated.
Repeat the process on the adjacent side and on all the teeth.
Once done throw the floss away as reusing floss leads to spread of infections as bacteria are reintroduced to the mouth.
Brush your teeth now to remove all the dislodged particles and remember to rinse afterwards.


